
|
Double Rainbow All The WayA Processing.js tutorial by Jim Bumgardner  There is also a version of this tutorial which has the same examples in HTML5/Canvas. If you compare both tutorials, you'll find that some aspects of this (especially the color manipulatoin) are easier in Processing. We'll start by making a rectangular bar, which is colored like a rainbow. To do this, I'm going to draw a series of lines of different colors. I'll start by just coloring them randomly, using the random number generator.
If you click on Example 1, you can see the code. If you refresh the page, the bar will look different because the random number generator produces different numbers each time. It doesn't look much like a rainbow, but it's something to start with. The bar is made up of 1-pixel lines. First I set up the coordinates of the top left edge of the bar, which are specified by left_margin and top_margin. Then I set the width and height of the bar. Finally, I draw each line, from top to bottom, in a for-loop. As the for-loop executes, the variable i takes on the values 0,1,2,3... all way to the height of the bar. This variable is used to set the Y position for each line.
float left_margin = 10;
float top_margin = 10;
float w = width - left_margin*2;
float h = height - top_margin*2;

for (int i = 0; i < h; ++i) {
  stroke( random(256), random(256), random(256) );
  line(left_margin, top_margin+i, left_margin+w, top_margin+i);
}
You'll notice that in the for-loop, I used random numbers to select a stroke color from RGB color space, before drawing
each line. Now, in a rainbow, the colors aren't random, so let's take the randomness out. I'll change the loop so that the
colors go from black to red.
Here I've removed the random color function, and changed the loop, to read as follows:
for (int i = 0; i < h; ++i) {
  float ratio = i/h;
  float red = 256 * ratio;
  float green = 0;
  float blue = 0;
  stroke( red, green, blue );
  line(left_margin, top_margin+i, left_margin+w, top_margin+i);
}
By the way, if I were writing this for myself, the interior of the loop would be two lines, without all the temporary variables:
for (int i = 0; i < h; ++i) {
  stroke( 256 * i/h, 0, 0);
  line(left_margin, top_margin+i, left_margin+w, top_margin+i);
}
The temporary variables are there to help illustrate what is going on. The variable ratio is i/h. During the loop it takes on values from 0 to just
below 1. I can then multiply this ratio by any other number to produce numbers in any range I like.
The red color is produced by multiplying the ratio by 256, which is the range of the red color component. Now I'll modify the code so as the red goes from 0 up to 255, the green goes in the other direction, from 255 down to 0. Here I've changed the line that sets the green: float green = 256 * (1 - ratio);By using 1-ratio, I make the value go backwards, from 1 to almost 0. I could probably combine a bunch of these gradient bars and produce a pretty good looking rainbow effect, but the code would be longer than necessary - there would need to be a separate loop for each band. Fortunately, there's an easier way. Instead of using RGB colors, I'll use HSB colors. RGB colors contain a red, green and blue component. HSB colors contain hue, saturation and brightness. We'll change to HSB using this line: colorMode(HSB, 1);In this space, hue is a value that goes from 0 to 1. It starts red, then goes through all the colors of the rainbow, and then comes back to red. Saturation is a value from 0 to 1 which tells how colorful the color is (from grayscale at 0, to fully saturated at 1). Brightness is a value from 0 to 1 which tells how light the color is (from black at 0, to white at 1). Note that the brightest colors are at 1 (not at 50% as they are in the HSL color model used in the CSS3 hsl() color specification). If we want a pure white, we have to turn the saturation down to 0. And here's a gradient which uses a ratio to walk through the available hues, drawing the brightest colors possible. Things are starting to look a little rainbowy, no?
The main drawing loop (which again could be reduced to two lines if you were so inclined) reads as follows:
colorMode(HSB, 1);

for (int i = 0; i < h; ++i) {
  float ratio = i/h;
  float hue = ratio;
  float saturation = 1;
  float brightness = 1;
  stroke( hue, saturation, brightness );
  line(left_margin, top_margin+i, left_margin+w, top_margin+i);
}
Many programmers would be happy with this gradient for a rainbow effect, and might stop here, which is fine. Let's take a break, and when we come back, we'll make it look even more like a rainbow.  Since I'll soon be adding some translucency, I'd like to get some sky behind the rainbow. This can be done by painting a sky-blue rectangle behind the rainbow. I googled to find some reasonable values for sky blue, and came up with some code, like so: color skyBlue = color(0x87, 0xCE, 0xEB); // Equivalent of the CSS color #87CEEB background(skyBlue);And here's what it looks like. I made the rainbow bar a little smaller than it was in example 4, so you can see the blue background behind it better.
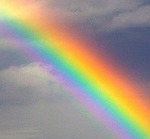 Notice how in the photograph, the yellow stripe is nearly in the middle, whereas in example 5, the yellow stripe happens much closer to the top. Also notice how near the top of the real rainbow, the colors change more slowly and at the bottom they seem to change faster. It takes about the same time to get from red to yellow (which are close in hue) as it does to get from yellow to magenta, which are far apart in hue. We can approximate this effect by multiplying our ratio by itself (or squaring it). It will still go from 0 to 1, because 0*0 = 0 and 1*1 = 1, but when it would normally be at .5, it will be at .5 * .5 or .25. 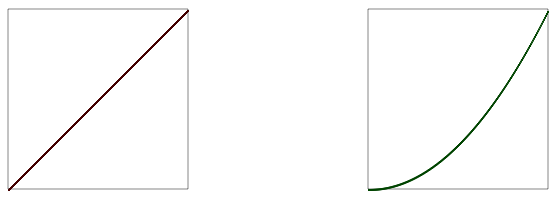
float hue = ratio;to float hue = ratio*ratio;It still isn't an exact match, but it's much better. Next, the rainbow will look better if it is translucent, especially on the edges. It turns out there is an CSS hsla() color specification that allows you to add a number to indicate opacity or "alpha". By tweaking the alpha, we get example 7. I used half of a sine wave for the alpha so that it would rise and fall as we draw across the bar. Take a look at the code of example 7 to see how I did it.
Now let's change those lines to curves, and we'll get the familiar rainbow arch. This is accomplished by changing our line function to an arc function, and changing our loop to draw each line of the arc.
float cx = width/2;
float cy = height;
float rainbowThick = width / 5.0;
float outerDiam = width * .9;

colorMode(HSB, 1);
noFill(); // I added this line to avoid filling the area below the arcs.

for (int i = 0; i < rainbowThick; ++i) {
  float ratio = i/rainbowThick;
  float hue = ratio*ratio;
  float saturation = 1;
  float brightness = 1;
  float alpha = sin( PI*ratio ) * 1.5 / 2;   // I use half the alpha level than before to compensate for overdraw
  stroke( hue, saturation, brightness, alpha );
  arc(cx, cy, outerDiam-i, outerDiam-i, PI, PI*2);
}
 Now let's do some more work on the background. It would be nice to have a gradient in the sky, just like we have in the rainbow. To do this, we'll draw more lines, introducing a new function setGradient() that changes from one color to another. By the way, this is one of the rare cases where Processing.js is not as easy to use as HTML5/Canvas - with direct Canvas calls, you can use gradients as fill and stroke colors.
Here's the code: color skyBlue = color(0x87, 0xCE, 0xEB); // Equivalent of the CSS color #87CEEB color lightSkyBlue = color(0x87, 0xCE, 0xFA); color deepSkyBlue = color(0x00, 0xBF, 0xFF); color white = color(255, 255, 255); setGradient(0, 0, width, height*.333, deepSkyBlue, skyBlue); setGradient(0, height*.333, width, height*.333, skyBlue, lightSkyBlue); setGradient(0, height*.666, width, height*.333, lightSkyBlue, white); Click on example 9 to see how setGradient is implemented. It's not pretty, but it's very similar to how we've already been doing gradient fills. So let's make a double rainbow, shall we? Looking at photos of double rainbows (and the small handful of double rainbows I have seen in my life time), I know that the outer rainbow is dimmer, and that the colors travel in the opposite direction. Here I've taken a stab at the general effect.
Finally, let's add a little animation, by cycling the saturation, and the luminance. I've also added some foreground fog to this final version. Hmm, it would be awesome if there were some puffy clouds to go with the rainbow. I guess that'll have to wait for the next tutorial. Have fun! Oh, in case you haven't seen it, here's my tutorial on drawing circles, spirals and sunflowers. If you are in the Los Angeles area, I'll be teaching a couple of graphics and music programming workshops in Culver City, using the Processing language, in the next few weeks. More info here.
Privacy Policy Contact krazydad Discord server |