This is a more advanced follow-up to my
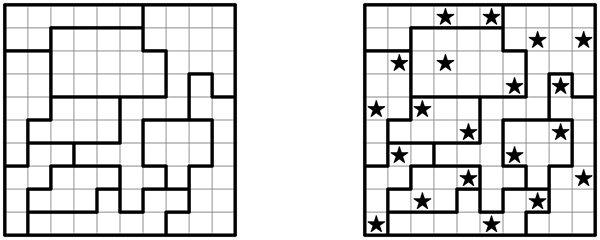
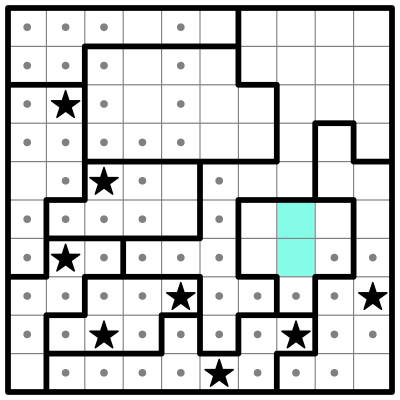
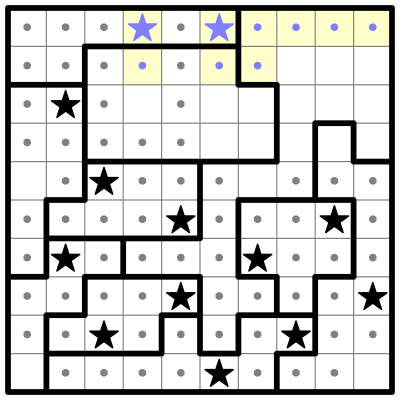
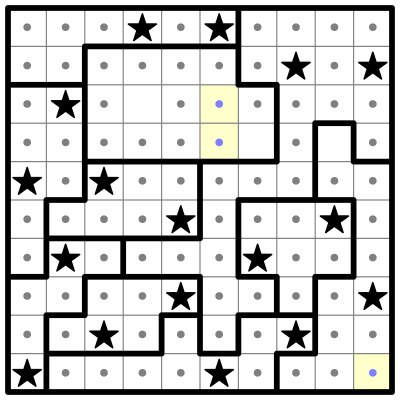
introduction to Two Not Touch puzzles. The medium-difficulty puzzle I'll be solving (shown above, with the answer to the right) is from my published Star Battle puzzles,
Volume 1, Book 40, Puzzle 14.
In these puzzles, each row, column and bolded region must contain exactly two stars. The stars can't touch each other, not even diagonally. So when you place a star, you can eliminate all the squares that immediately surround it, and when you place the second star in a row, column, or bolded region you can eliminate all the remaining cells in that grouping as well.
NOTE: In this tutorial, I use the words square and cell interchangeably.
So let's solve this puzzle!
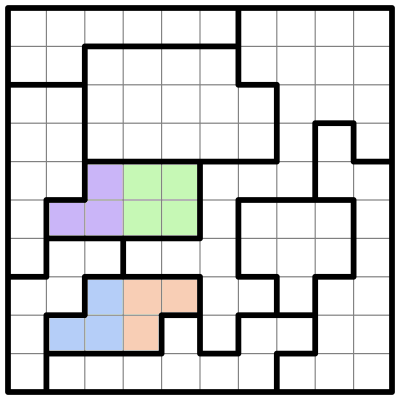
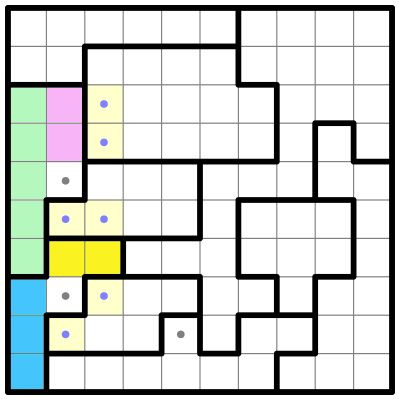
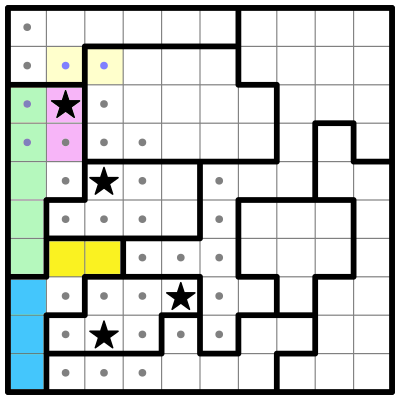
As usual, the first thing I do is look at the smallest regions. I don't see any regions small enough that we can immediately place a star, like in the previous puzzle. But a few of them pop out at me. I'm going to highlight two of these regions, using color to split them up into smaller sub-regions:
Both of these regions can be subvided neatly into two sub-regions that each fit within a 2x2 square (or a "four-square"). Each of those sub-regions must contain a single star. We can only fit one star in each sub-region, and if the sub-region had no stars, there wouldn't be room in the other sub-region to fit two stars.
Three of these sub-regions are missing a corner, and we can eliminate those corner squares. Why? Because if stars were placed on those corners, they would crowd out any stars from appearing in the other 3 cells, where we know there must be at least one star.
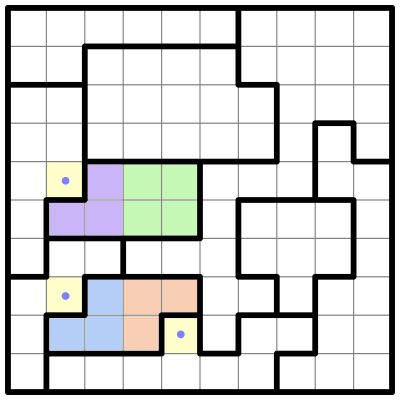
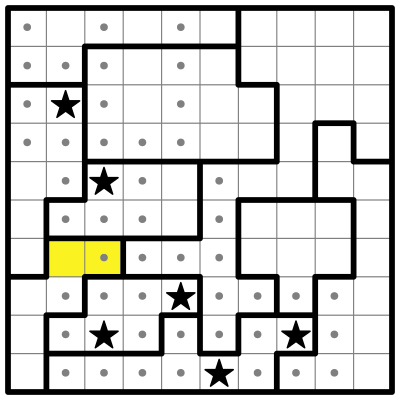
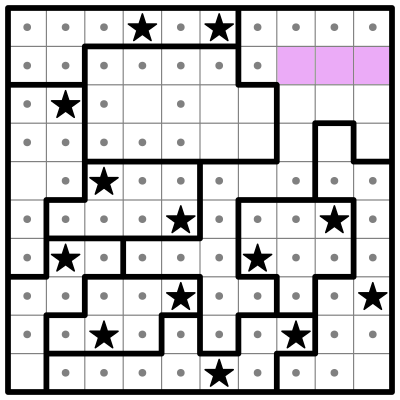
Now I'll subdivide two other regions into colored parts:
These parts don’t all fit neatly into a four-square, but there is still some reasoning we can do. Both of these regions have a small 2-cell sub-region, which I’ll call Pink and Yellow, and a long straight sub-region to the left, which I’ll call Green and Blue.
Pink and Yellow are so small that they may contain at most a single star, which means that Green and Blue must each contain at least one star, so that their bolded regions have the two stars required to solve the puzzle. But: neither Green nor Blue can contain two stars! If one of them did, the other couldn’t have any stars at all, as they’re in the same column. And we just determined that they each must have at least one star.
Therefore, both Green and Blue must have one star apiece, and both Pink and Yellow must have one star apiece as well.
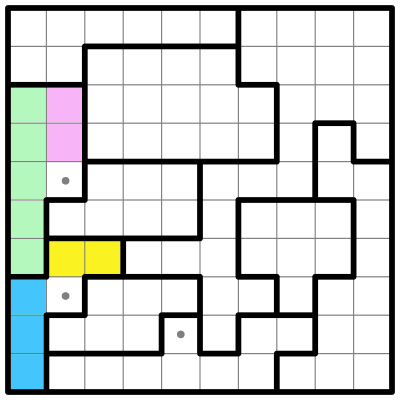
I can now eliminate any external squares which are adjacent to every cell in one of the colored regions. Like so:
I can also eliminate the remaining cells in column 1.
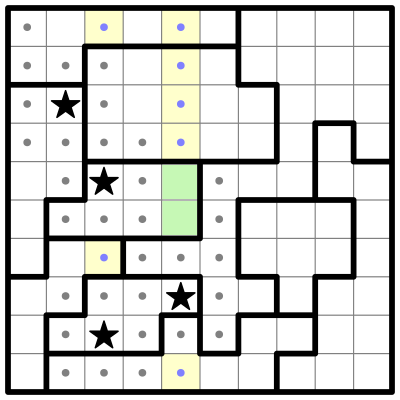
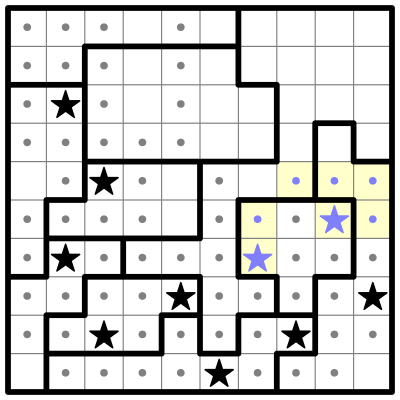
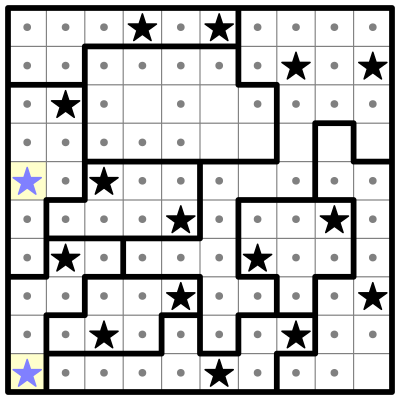
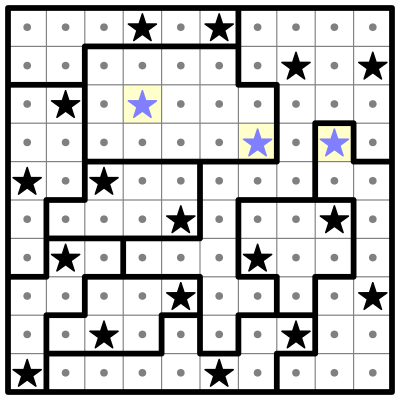
Now, highlighting our original two regions of interest...
...I can see the blue and purple sub-regions (which we've already established must contain a single star) have each been reduced to a single open square. We can place our first stars in those squares, and eliminate any surrounding cells.
...And now the salmon-colored sub-region also can get its star.
...And any cells which are adjacent to the remaining two open cells in the green sub-region can be eliminated.
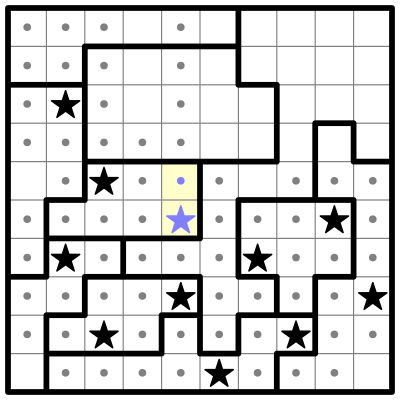
Let's look again at the sub-regions on the left:
The pink sub-region (which we've established must contain one star) is now down to one square. So let's put the star in.
We've placed two stars in column 3, and can now eliminate other cells from column 3.
We also know the two cells the remaining star in column 5 must go into. So we can eliminate the rest of the cells in column 5.
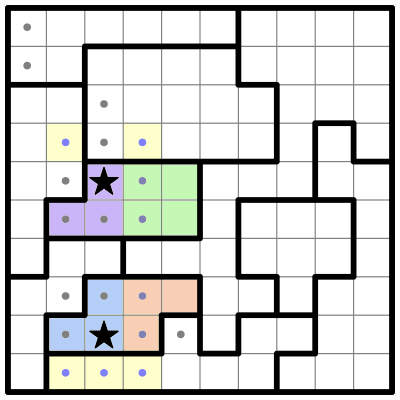
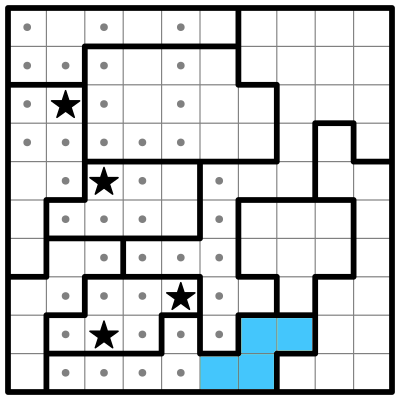
Now let me draw your attention to the bottom center region, which has 4 remaining open cells, which I've highlighted in blue:
This region must contain two stars. We can eliminate the two center cells in the blue region, since placing a star in either of them would prevent us from placing a second star.
That leaves two remaining cells which must contain the two stars. I'll place those and eliminate the surrounding squares.
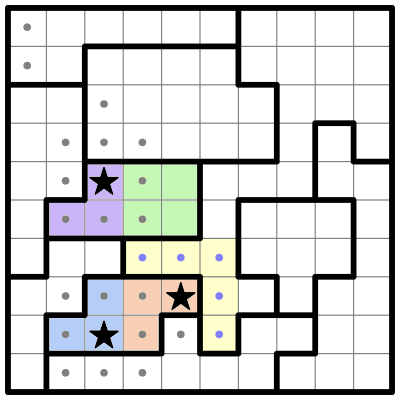
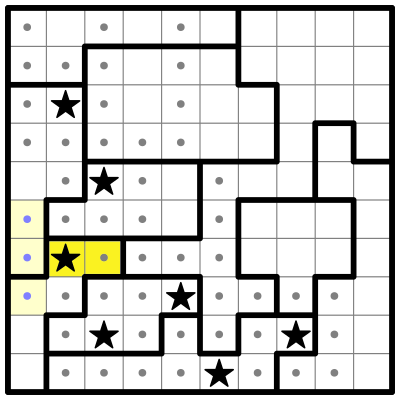
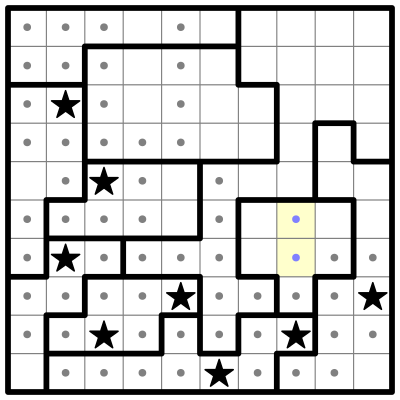
Now I'll highlight a region we were looking at earlier in yellow.
We previously deduced this yellow sub-region must contain a star. Since there's only one cell left, that's where the star goes. I'll place the star and eliminate its neighboring cells.
Row 8 (below the star we just placed) now has one remaining open square, which must contain its second star. I'll place that and clear its neighbors.
Now some clean up. I can see that column 2 already has two stars, so we can eliminate the remaining open square. Similarly, we can clean up row 9.
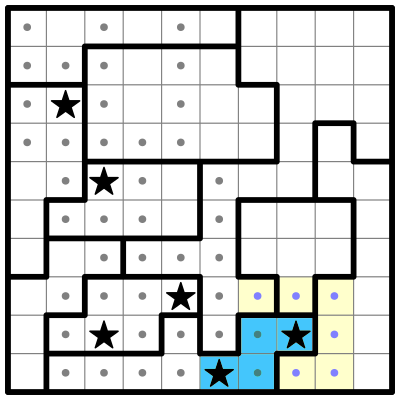
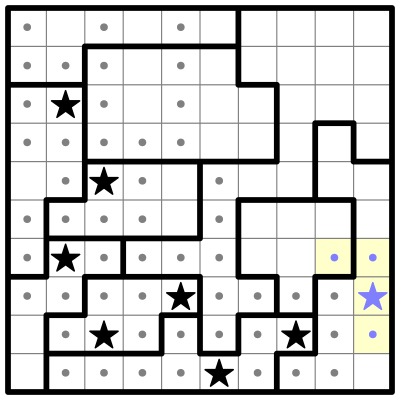
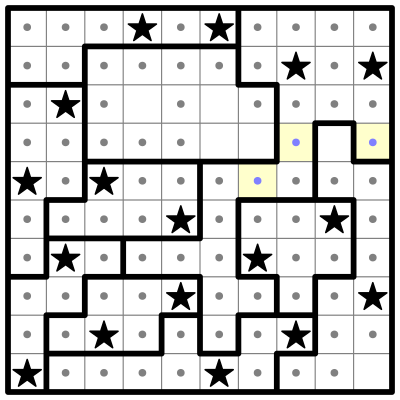
You may have noticed there are more stars to place in column 1, but before we go there, take a look at the two highlighted cyan squares in the next illustration.
I can see that they must be eliminated because placing a single star in them would prevent a second star from being placed in the containing region. So I'll eliminate them.
This leaves a single open square for a star on the right side of that region. Also row 7 now has a single remaining spot for a star, so I'll place both of these.
Row 6 now has a single remaining spot for a star. I'll place that.
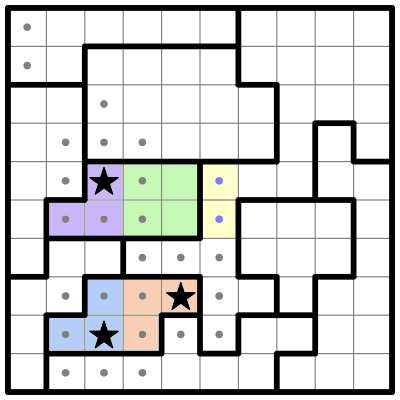
Now take a look at the region in the upper left, which I've highlighted green below.
The green region has two remaining spots for stars. I'll go ahead and star those, and then finish out row 1.
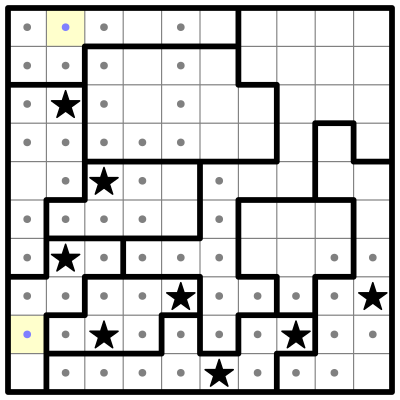
Row 2 now has 3 remaining open squares, for which there is only one way to fit its two stars.
I'll place those.
Now I'll place the stars in the two remaining open cells in column 1.
The large twisty region that contains both of the stars in row 2 is complete, so I'll eliminate its remaining cells.
We can complete column 6, and column 10, which now have two stars each.
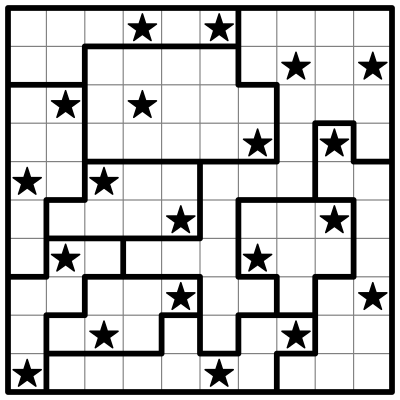
And the remaining three open cells all contain stars.
The puzzle is solved!